
Adding a Favicon to Your Site – HTML, WordPress, Shopify & More
Learn how to add a favicon for your site. The term favicon comes from “favorite icon” and has expanded its meaning to include a range of areas where your website’s logos is shown. The favicon appears in the page tab on modern web browsers and also appears next to your site’s listing in mobile search results on Google.
Google’s newer, logo-centric mobile search results design means that there’s now a greater emphasis on website branding. The design now puts page URL breadcrumbs and brand logos above the classic page title and meta description.
So, what does this mean for website owners and how do you make sure your site’s favicon appears in search results? Do favicons affect rankings? The change means that branding and favicons will be more visible to people browsing the search results. Moreover, what they click on might be based more on brand recognition than it used to be. Favicons are not a search engine ranking factor, but they do have the secondary SEO benefit of helping your brand be more visually prominent.
Learn how to set up your favicon in the following platforms:
How Do You Setup Your Favicon?
For your favicon to be eligible, you must follow the guidelines laid out by Google. Following these rules will make it easier for search algorithms to digest your favicon and display it to searchers. These are the guidelines from Google for adding a favicon to your site:
- Both the favicon file and the home page must be crawlable by Google (that is, they cannot be blocked to Google).
- Your favicon should be a visual representation of your website’s brand, in order to help users quickly identify your site when they scan through search results.
- Your favicon should be a multiple of 48px squared, for example: 48x48px, 96x96px, 144x144px and so on. SVG files, of course, do not have a specific size. Any valid favicon format is supported. Google will rescale your image to 16x16px for use in search results, so make sure that it looks good at that resolution. Note: do not provide a 16x16px favicon.
- The favicon URL should be stable (don’t change the URL frequently).
- Google will not show any favicon that it deems inappropriate, including pornography or hate symbols (for example, swastikas). If this type of imagery is discovered within a favicon, Google will replace it with a default icon.
When your favicon is ready, you can install it in the header of your site’s home page. Do not add the favicon to other pages on your site. You can use the <link> rel attribute for the HTML of your site. If you simply want add a favicon to your site directly with HTML than use this syntax:
<link rel=”shortcut icon” href=”/path/to/favicon.ico”>
For the file path, you can use either an absolute path, or a relative path. Either will work– as long as the image is on the same domain as your site’s homepage.
The “rel” string of this HTML favicon attribute can be written several ways. Use “shortcut icon,” “icon,” “apple-touch-icon,” or “apple-touch-icon-precomposed.”
How to Add Your Favicon to a WordPress Site
There are two ways to add a favicon to a WordPress site depending on which version you have. Uploading your file directly in the Admin area of your site has been an option since WordPress 4.3. First, Login to the administrative section of your WordPress content management system (CMS) using your site’s credentials. This is the directory of your site, where you are able to adjust settings and edit pages, content, and the design of your site.
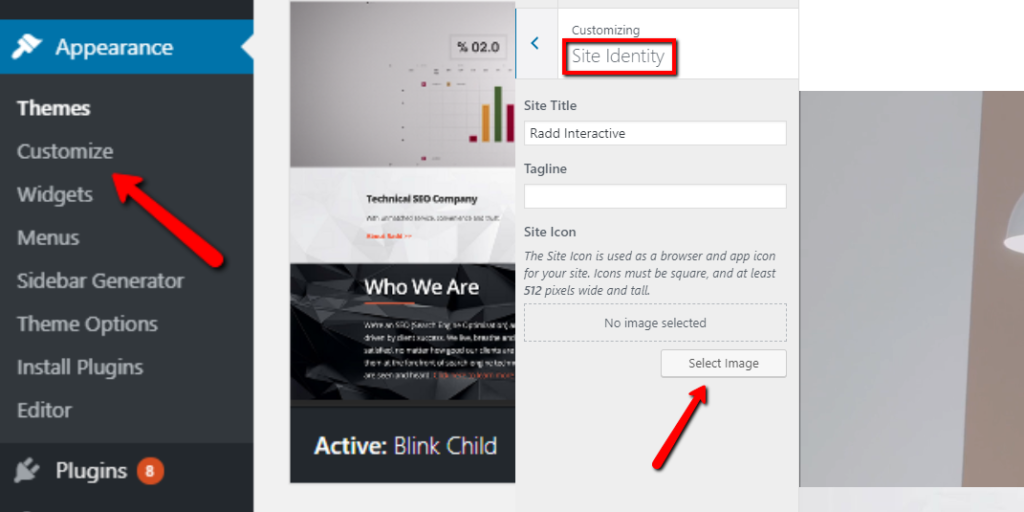
- Navigate to Appearance > Customize, and then click on the Site Identity tab. Here you can upload your favicon directly once it’s been formatted correctly. This section of the WordPress CMS allows you to easily change the site title and adjust header appearance.
- Here you upload your site’s brand icon by clicking on “Select Icon” and choosing your favicon file. This option is available in WordPress 4.3 and up. After this you can preview your changes and look for your favicon in the browser tab.
The 2nd way of uploading your favicon should work for all versions of WordPress as well as older versions where the above option is not available (version 4.2 or older).
You can simply upload your favicon to your site root directory using FTP.
How to Add Your Favicon to a Shopify Site
For site’s set up using the Shopify CMS you can upload the favicon in just a few simple steps. Shopify has an advantage of being one of the CMSs where uploading the icon using a file-manager isn’t necessary – you can do so directly in the admin portal.
- Login to the admin section and use the navigation menu on the left to find the area for adding your web store’s favicon.
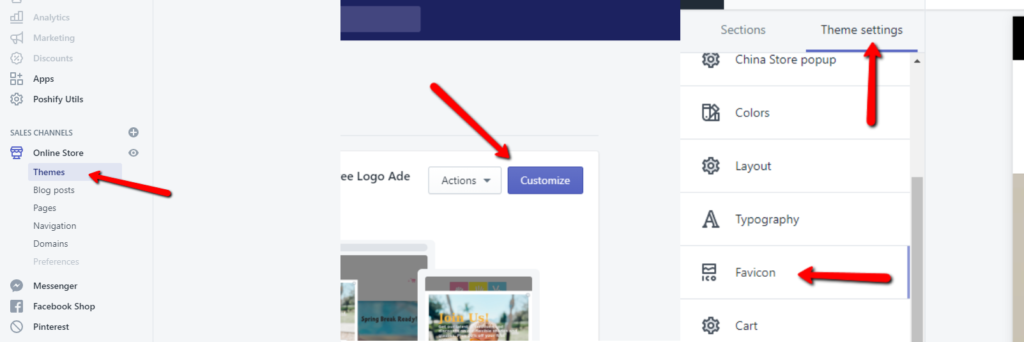
- Go to Online Store > Themes and click on “Customize.”
- Next, in the theme editor toolbar go to Theme settings > Favicon > Favicon image and click on “Select image.”
- From here you’ll be able to either select an image that you have already uploaded to your Shopify image library or upload an image directly from your computer.
How to Add Your Favicon to a Magento 2 Site
Here’s how you change or add your website favicon in Magento 2 – in fact, there are two ways. Magento sites will have a default 16px x 16px favicon by default, which you will have to replace if you want your Magento web store or site to reflect your own branding.
In the admin section of your Magento 2 account, use the left side navigation pane to find the favicon’s location.
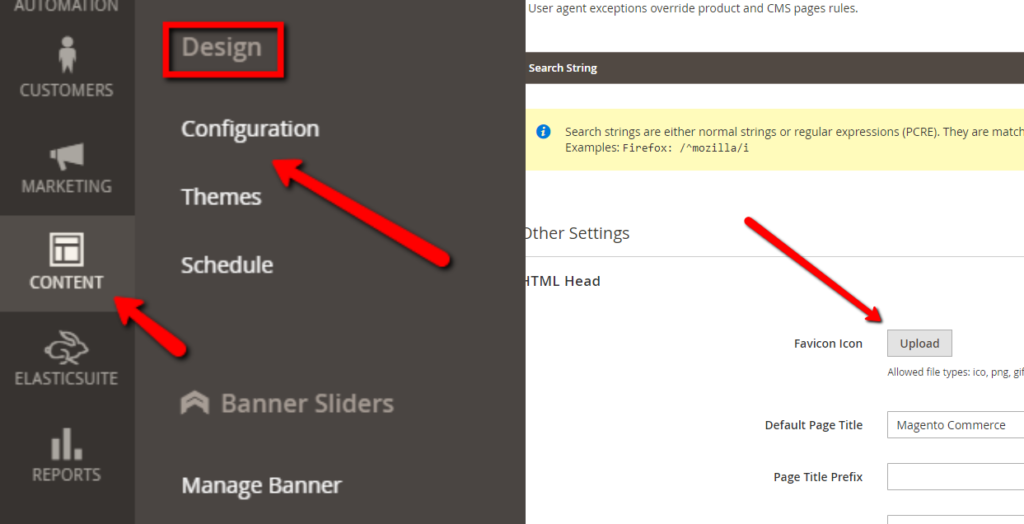
- Go to Content > Design > Configuration, here you’ll find the configuration settings.
- Next you can choose which site, website store, or store view for which you want to change your icon.
- Click on “Edit” on the right site and then go to Other Settings > HTML Head. Where it says “Favicon Icon” you can upload your image file and then save your configuration.
The 2nd way to change a favicon in Magento is to manually add a snippet of code for your icon into the <your_theme_dir>/Magento_Theme/web/ directory. For this you may need FTP access or a Magento add-on that allows you to access these files.
Changing Your Favicon in Wix
To update your customized favicon in Wix you need to first ensure that you have a premium plan with the CMS platform. You also need to have your site connected to a domain. Standard Wix sites are set up with a free Wix based subdomain (username.wixsite.com/siteaddress). A premium plan with private brand domain will allow you to customize your online image, including your favicon.
You update your icon by following these steps:
- Go to the Settings in your site’s dashboard in the admin area.
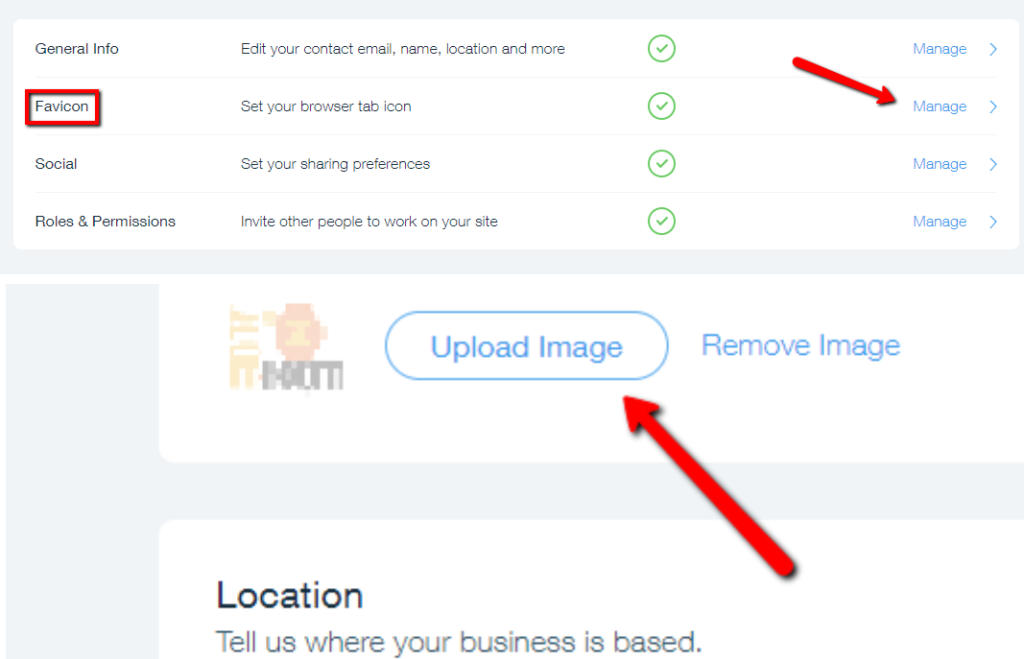
- Navigate to Manage > Favicon.
- Click on “Upload Image” and select an existing image on your Wix admin profile or click on “Upload Media” to choose an image file directly from your computer.
- Click on “Add to Page.” You’ll be able to preview your changes from here.
- Click on “Save” to complete uploading your Wix favicon.
Changing Your Favicon in Squarespace
Without a custom icon, your Squarespace site will feature the default Squarespace cube favicon. In order to give your site a custom branded identity, you can change your Favicon image in Squarespace by navigating through these steps.
If you have Version 7.0 of the Squarespace platform this is how you update your icon. Check which version you have with Squarespace’s guide.
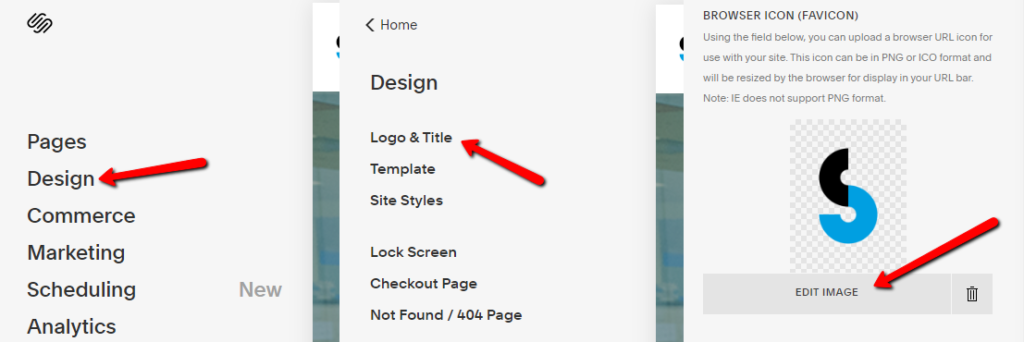
- From the admin area of your site, go to Home Menu > Design > Logo & Title.
- Scroll down to “Browser Icon (Favicon)” and upload your selected and formatted image directly from your computer.
- Click “Save” to complete uploading your favicon.
If you have version 7.1, the instructions are largely the same, but the favicon settings will be under slightly different names.
- From the admin area of your site, go to Home Menu > Design > Browser Icon.
- Upload your customized image file directly from your computer into the uploader.
- Click “Save” to complete uploading your favicon.
How to Change Your Joomla! Favicon
Adding your site icon to a Joomla! site is a bit more technical than other popular platforms, but it is still simple enough to do yourself. After you’ve created and optimized your image as an ICO format photo you can upload it to your site.
- Copy the file to the /joomla/templates/<your template> directory and name it “favicon.ico.”
- You will need to upload your logo ICO file using FTP or whichever file manager tool you normally use to access the template files.
- Reload your site to make sure your favicon appears in the browser tab.
Some Joomla! sites use different templates that redirects your browser to another directory for the icon’s files. Check out https://yoursite.com/templates/your_template/index.php in your browser and look for code that reference <link rel=”shortcut icon”. Here you will discover the directory and file name.
How to Change the Site Favicon in Drupal
Here’s how you change your Drupal favicon. Once you have created your favicon file, you can go into the Drupal platform and upload it to your site. It will be in the theme section for your site
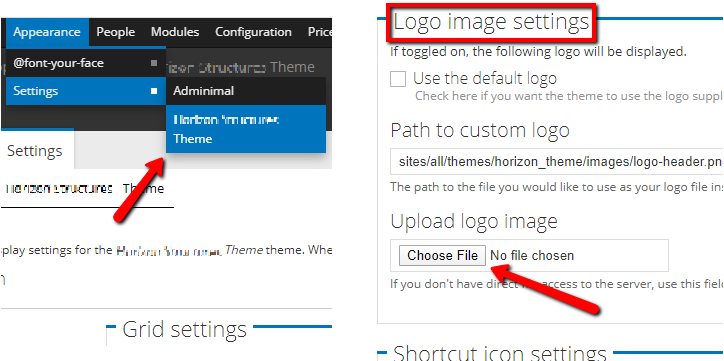
- Go to your admin page > build > themes > settings > THEME.
- Select the “Shortcut icon settings” section toward the bottom of the theme configuration page.
- If you have Drupal 7 then the location will be slightly different. Then you go to the admin page > appearance > settings > THEME.
- From here you can upload your image file to the “Logo image settings” section.