
How to Set Up Bing Webmaster Tools + Adding & Verifying a Site
Bing’s Webmaster Tools is a neat resource that lets website owners monitor the status of their site in Bing’s search results; along with data about site traffic, rankings, indexing, and any problems that could affect SEO.
That means that setting up Webmaster Tools is a good way for businesses to monitor their site and to head off any issues that could sink their site’s organic traffic coming from Microsoft’s Bing search engine (in this way it’s a lot like Google’s Search Console).
Here’s how to set up Bing Webmaster Tools (or BWT for short) and how to add a site to your account. We’ve written up a step-by-step guide for completing the process and for verifying your domain properly.
From opening a free account online, to verifying ownership of your website’s domain, to accessing the Webmaster Tools console there are multiple steps needed before businesses can start using the platform – but it’s not too difficult and it can be done pretty easily. Taking advantage of Bing’s Webmaster Tools is great because it’s freely available to everyone and it can go a long way to helping you keep up with search optimization and Bing SEM (search engine management).
The good news though is that you are not required to have Webmaster Tools in order to get your business listed on Bing. As a search engine, it can use crawler bots to discover, render, and index your website automatically. But there are a few resources within the platform that can help site owners control and encourage indexing.
First, create a Bing Webmaster Tools account
The first step is to open a free Bing Webmaster tools account or to sign-in to your account if you have one already.
Right off the bat, Microsoft allows for 3 separate ways to create an account, using either a Microsoft account, Facebook, or a Google account. Businesses that are doing this step on their own can follow Microsoft’s checklist/guide on how to set up Bing Webmaster Tools. Following this guide and following the prompts should be simple enough to get through it. But we’ve given more details on the actual steps below.

This process is straightforward and pretty much the same as creating an account for any sort of platform. If you already have a Google account used for your domain’s Google Search Console then you can use that same account and then import your site from Google Search Console (doing this won’t provide any extra SEO ranking advantage).
If you already have Bing Webmasters setup, then the next step for adding a site to your account can be done by going into the top left corner and clicking on the “globe” icon. Next find “+ Add a site” in the drop-down menu and follow the prompts – shown in the screenshot below.

We go more into detail on how to add/verify a site in the steps below.
Option 1: set up using a Microsoft account
It’s possible to setup Bing Webmaster Tools using a regular Microsoft account as well, and the steps after that are mostly the same as using the other methods. Site owners can create a Microsoft account during the process, or they can even use the phone number or Skype information associate with their existing account.
Plus, Microsoft allows sign-in options with two-step verification (2FA), personal GitHub accounts (that have been linked to a personal Microsoft account), or business/organization accounts.
After your account is created you can then verify your domain by importing settings through GSC or by verifying manually.
Option 2: set up using a Facebook account

Microsoft expanded their set-up process back in 2018 to include social logins after a lot of site owners and webmasters requested the option. The option for “social login” includes both Google and Facebook.
According to Bing, using this option means that the messages/warnings Webmaster Tools sometimes sends site owners about their domain properties will be sent to the email account associated with the webmaster tools account they are logged in with.
After your account is created this way, you will be prompted to either import settings using GSC or to manually verify your site (this is the same as with the methods below).
Option 3: set up & verify your Webmaster Tools by importing from a Google Search Console account
If you choose the Google account option for example, it will give you the option to “Import your sites from GSC.” Here’s how to add a site to Bing webmaster tools this way.

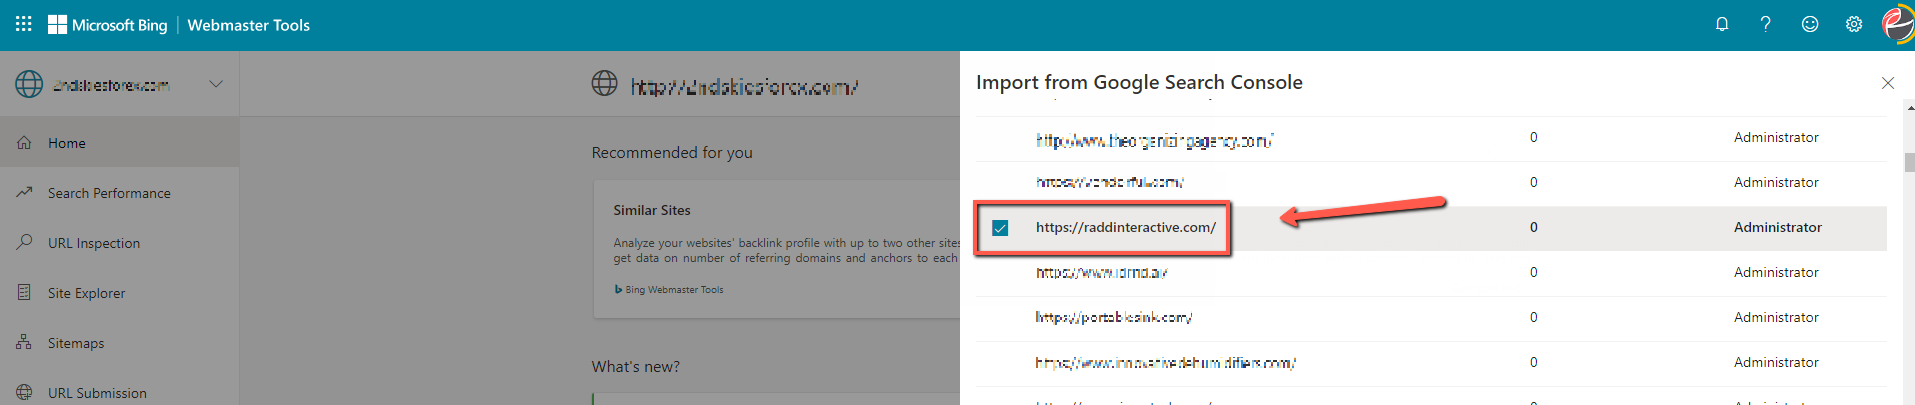
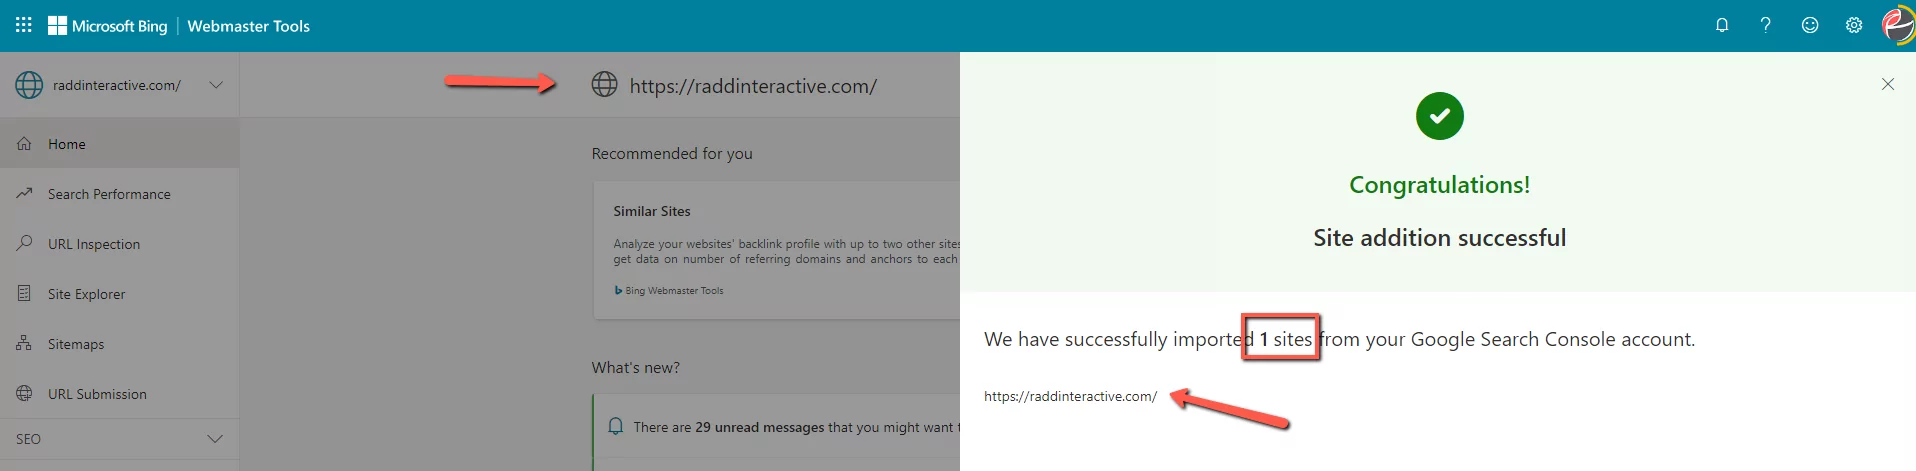
If you select this option for Bing Webmaster Tools setup, then you’ll be prompted to continue importing a list of your sites from GSC. Bing will display a message here explaining the process – and it’s easy enough to follow their prompts. Bing explains during this step that they will import a list of your verified GSC sites automatically into your Bing Webmaster Tools account, but only a list – next you’ll be given the option to choose which sites you actually want to add to your account. After it’s finished it will confirm the import and then it will show how many domains were imported.
Doing this also provides the option of importing your submitted sitemaps in Search Console, effectively submitting your sitemap automatically to Bing’s index.
Bing also provides businesses and site owners with more information on best practices for this process.
Business owners (or anyone actually) can import multiple sites from their multiple Google Search Console accounts. In fact it’s possible to import as many as 100 websites at once, and Microsoft allows for a maximum of 1,000 domains for a single setup Bing Webmaster Tools account.
The sites you choose to add to your BWT will be added and then automatically verified in Bing Webmaster Tools. Bing offers an option for site owners to import traffic data, but this is mainly used for verification and for checking data accuracy – but if you do go this route, it can take up to 48 hours to get traffic data for the newly verified websites.
It’s not necessary to use in-code verifications when you set-up Bing webmaster tools using GSC – instead, BWT will periodically validate your site(s) with your GSC account. This means that these accounts do have to be linked together permanently though – or otherwise a different verification process would have to be used later on down the road (either an in-code option or the “Domain Connect” option.)
Option 4: setup & verify your Webmaster through a Google account manually
This option allows business owners and webmasters to simply plug in their domain using the “Enter your site URL” field. From there it will prompt you to verify using one of several options.
- Verify with an XML file upload to the site’s root directory
- Verify with a permanent HTML meta tag added to your site’s homepage
- Verify by manually adding CNAME record to your site’s DNS
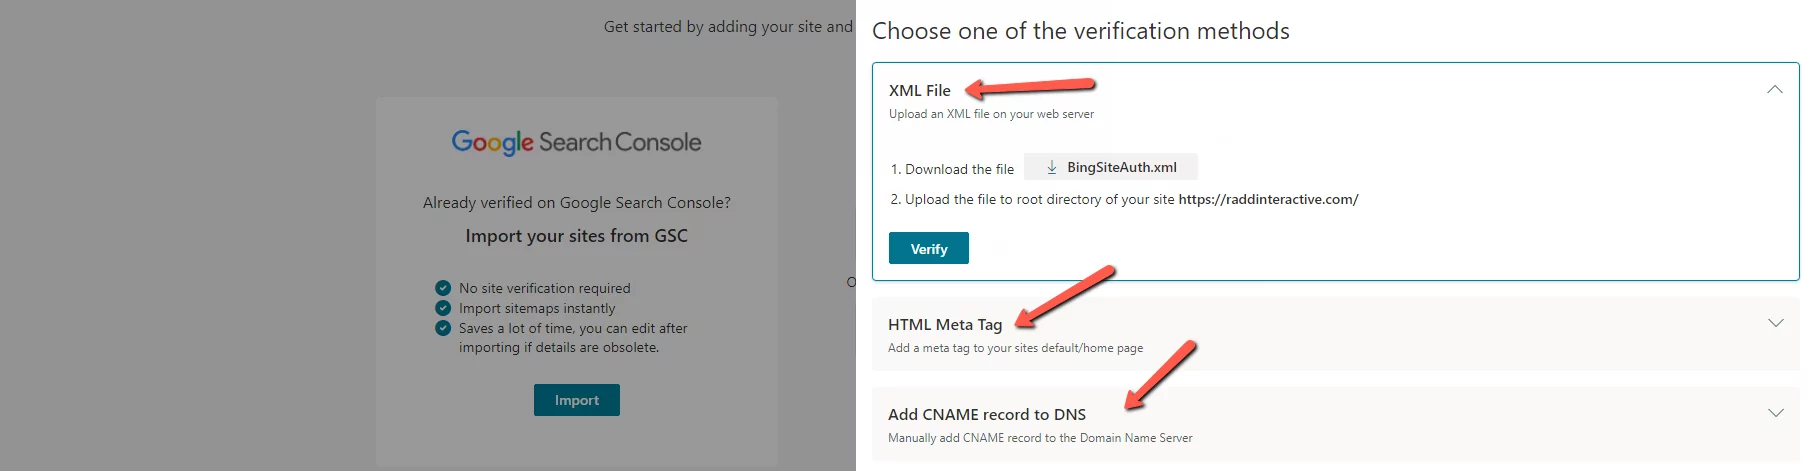
It’s only necessary to choose one of these options in order to verify your site. With this option you’ll have to follow the instructions for implementing the verification codes – or business owners will have to contact their webmaster/web-developer to complete them.
The XML file upload option, and the HTML meta tag option will both vary differently depending on the CMS or platform used for your site – so we won’t cover them in detail in this guide.
Verify your setup using Domain Connect
We mentioned this above as one of the options for “verifying” a site after setting up an account using Microsoft, Google, or Facebook. Afterall, setting up the account is only half the process – the next half is verifying your site’s domain.
Bing’s “Domain Connect” is one of the ways of doing this. One of these methods – adding a CNAME record to DNS – doesn’t require access to the site’s source code, but it does require access to the domain hosting account to modify the CNAME record. That is where the verification code can be added to complete the Bing Webmaster Tools setup.
Domain Connect is an open standard resource that makes it easier for a site owner to configure DNS for a domain running at a DNS provider to work with a 3rd party service (like Bing’s Webmaster Tools for example).
When trying to “add” a site to BWT, the platform will check if your site can support the Domain Connect protocol. According to Microsoft:
“When you Add the website information, Bing Webmaster Tools will do background check to identify if that domain/website is hosted on DNS provider that has integrated Domain Connect solution with Bing Webmaster Tools.”
Following the prompts here will take you to the DNS provider site, you can sign in, then the verification will happen automatically. In some cases, it might take longer for your DNS provider to send the site verification signal to Bing Webmaster Tools.
How to add your site to search results in Bing Webmaster Tools
Once you know how to set up Bing’s Webmaster Tools, complete the process, and have verified your site, there isn’t necessarily anything else to do next. Like we said above, as a search engine Bing is capable of crawling and indexing your site automatically – you don’t even need a BWT account for this at all. But for understanding your SEO it can help.
To really complete your Bing Webmaster setup, you can submit your sitemap so that your site is crawled and re-indexed regularly (in fact, you can check out our guide on how to get your business listed on Bing). Plus, if you have imported your site to BWT using Google Search Console, then there is a chance that your submitted-sitemaps were imported as well and that Microsoft was able to submit your sitemaps for you.
To check, in the left-side panel navigate to: Sitemaps > Sitemap details.
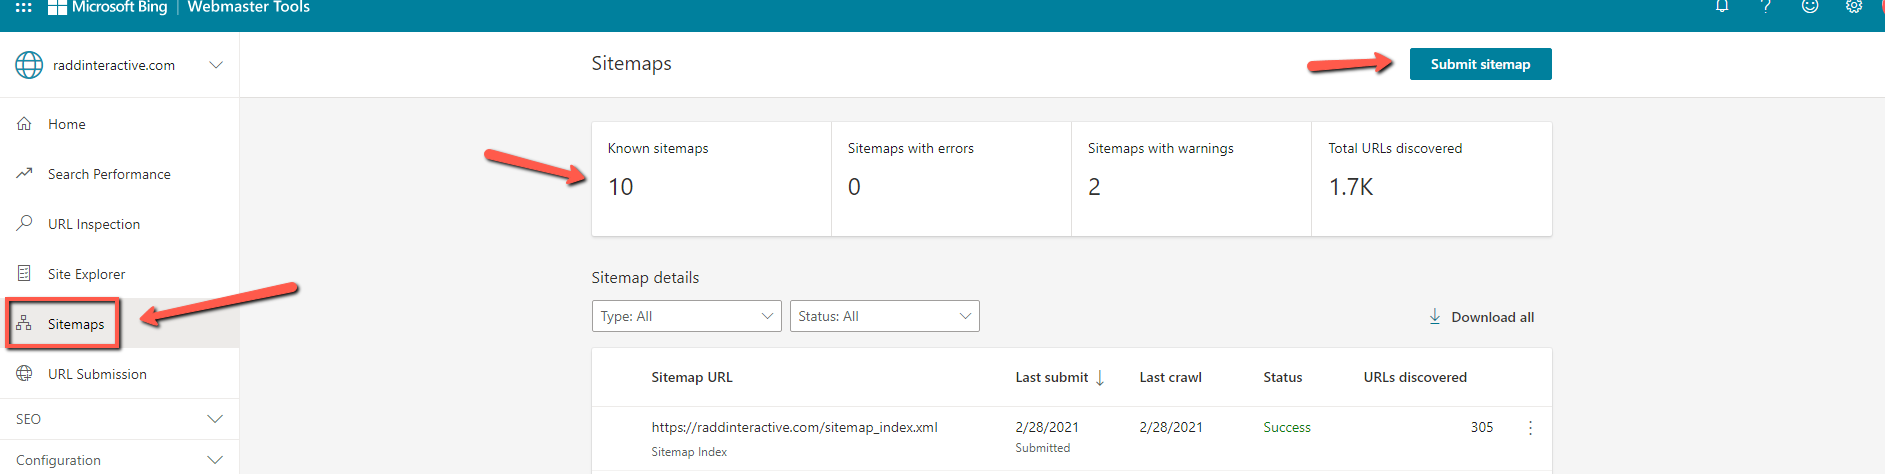
From here you’ll be able to see if your sitemaps are already discovered/submitted. If not then you’ll be able to click on “Submit sitemap” in the top righthand corner to submit one yourself. This is a key step to managing your business in search results.
The URL submission tool
There is another way to request indexing for Bing.
Bing recommends that businesses use the URL Submission tool to get their web content indexed as soon as they publish or update it. Webmasters can submit URLs to Bing through the Submit URL API or they can use the Submit URLs feature in the “URL Submission” section in the left-side nav panel. If you’ve just completed setting up Bing Webmaster Tools, this is another way of getting your site’s URLs indexed ASAP.
You can submit up to 10,000 URLs a day.
Learn More!
Contact our team below to learn more about how to setup Bing Webmaster Tools or to learn how to grow your SEO performance!